How to Fix a Flat on a Hub-Motor E-Bike
A rear puncture on a hub-motor e-bike is the same repair as on any bike, wrapped in three extra problems: a power cable coming out of the axle, washers that have to go back the right way round, and a wheel that can weigh 15 to 25 pounds. None of them is hard. All of them punish doing things out of order.
If the flat is on the front wheel of a rear-hub bike, or your bike has a mid-drive motor, this is an ordinary bicycle repair. This guide is for the wheel with the motor in it.
There’s one product link on this page, near the end. abouteBikes is funded by affiliate commission. As an Amazon Associate we earn from qualifying purchases, at no extra cost to you. How we make money.
Want fewer flats? See our 7 puncture-protection picks →
First, try not taking the wheel off
You often don’t need to. If you can find the hole, you can patch the tube with the wheel still in the frame.
- Put some air in and listen for the leak, or pass the tire slowly past your cheek. Check the tread at that spot for whatever caused it.
- Lever one side of the tire off the rim around that section only.
- Pull out the stretch of tube with the hole in it and patch it.
- Remove the thorn or glass from the tire. Feel carefully around the inside of the casing at that spot, because it’s sharp.
- Tuck the tube back in, reseat the tire and pump it up.
This handles most roadside punctures from glass and thorns. It won’t fix a split seam, a torn valve or a tire with a cut you can see daylight through. For those, the wheel comes out.
What you need
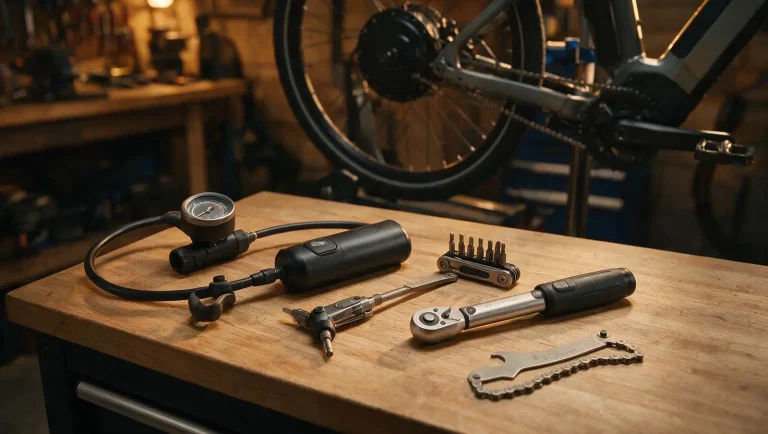
| Wrench | For the axle nuts. Usually 18mm or 19mm on hub motors, but check yours at home, not at the roadside. |
| Tire levers | Two or three. E-bike tires are stiff, and puncture-resistant ones are stiffer. |
| Spare tube | Right size and right valve. Schrader is common on e-bikes. |
| Pump | A mini pump for the road. A floor pump with a gauge at home. |
| Patch kit | For the in-frame repair above. |
| Your phone | To photograph the axle before you take it apart. |
Taking the wheel out
- Turn the bike off and remove the battery. With the bike upside down, a knocked throttle can spin the wheel. Taking the battery off also removes a lot of weight.
- Shift to the smallest rear cog. It slackens the chain and makes the wheel easier to get out and back in.
- Unplug the motor cable. Look for a round, waterproof inline connector a few inches along the cable from the axle, often zip-tied to the chainstay. Pull on the connector body, never the wire. Some have a locking sleeve that unscrews first.
- Photograph both sides of the axle. This is the step people skip and regret. You want the order of nuts and washers, and which way round the torque washers sit.
- Support the bike. A work stand is ideal. Upside down on the saddle and bars works too, but it can scratch or crack a handlebar display, so put a jacket under it or unclip the display if it comes off.
- Undo the axle nuts, and open the brake if it’s a rim brake. Lay the washers out in order on a rag.
- Pull the derailleur back and lift the wheel out. It’s heavier than you expect. Don’t let it hang from the cable at any point.
Disc brakes: don’t squeeze the brake lever while the wheel is out. Hydraulic pistons will creep closed and the rotor won’t fit back between the pads. If it happens, a clean, flat plastic tool will push them apart again.
Fixing the tire
From here it’s a normal repair, with one rule: find the cause before the new tube goes in.
- Run your fingers slowly round the inside of the tire and check the tread outside. A thorn left in the casing will puncture the new tube within a mile.
- Look at the old tube. Two parallel slits like a snakebite mean a pinch flat from low pressure, not something sharp. A new tube won’t fix a pressure problem.
- A hole on the rim side of the tube usually means the rim tape has shifted off a spoke hole. Check it covers every one.
- Put a little air in the new tube so it holds its shape, fit it, then seat the tire. Do the last section by hand if you can. Levers are how new tubes get pinched.
Putting it back
- Guide the wheel in with the chain on the smallest cog, the rotor between the brake pads, and the flats on the axle seated fully in the dropouts.
- Refit the washers exactly as your photo shows. A torque washer has a tab that locates in the dropout, and that tab is what stops the axle turning under motor torque. Fit it the wrong way round and the axle can spin in the dropout and rip the motor cable out. That’s the expensive mistake this whole guide exists to prevent.
- Check the wheel sits centered in the frame, then tighten the axle nuts evenly, a bit at a time on each side. Use the torque figure in your bike’s manual. Hub motor axle nuts need to be far tighter than anything on a bicycle, and a loose nut is how torque washers fail.
- If the bike has a torque arm, as most converted bikes should, refit it and tighten it.
- Reconnect the motor cable, lining up the arrows or marks. It should leave the axle in a gentle loop, not a sharp bend, and not touch the frame or the rotor.
- Close the rim brake if you have one, pump the tire to the pressure on the sidewall and refit the battery.
Test before you ride
- Spin the wheel. It should turn freely without the brake rubbing.
- Push the bike and brake hard with each lever.
- Ride slowly in the lowest assist level and listen. A clunk as the motor engages means the axle has moved. Stop and recheck it.
- Check the axle nuts again after your first ride.
When it isn’t a roadside job
In the dark, in the rain or in a hurry, don’t try. A small sealant inflator can get a tread puncture home. Some auto clubs, including some AAA regions, now offer bicycle roadside assistance, so check your membership. And a bike shop can do the whole job in well under an hour if you’d rather walk the bike there.
Stop it happening again
Every rear flat on a hub-motor bike is an argument for prevention. In order of value:
- Pressure, checked weekly with a floor pump and gauge. Most pinch flats are pressure flats.
- Sealant in the tubes. Slime seals tread punctures up to 1/8 inch as they happen, so many flats never become flats.
- A tougher rear tire when the current one wears out. The Marathon Plus for pavement, the Marathon E-Plus for faster or heavier bikes.
For inner tubes only, and it needs a removable valve core. It won’t help with sidewall cuts or pinch flats.
That crowded rear axle causes trouble beyond flats. It decides whether a rack will bolt on and whether a trailer hitch will fit, which our racks guide and child trailer guide both run into. Our full tire and puncture protection guide compares the options above side by side.
Do this today
Find out which wrench fits your axle nuts. Photograph the axle while the bike is clean and dry in your garage. Then put that wrench and two tire levers in your bag. At the roadside, the job is mostly about not having to work anything out.
Tired of fixing flats?
We’ve compared seven ways to stop them: tires, liners, sealant and the pump that prevents more flats than any of them.
How we choose
This page is a procedure rather than a product list. Hub motor designs vary: some use thru-axles, some have the cable connector right at the axle, some have torque plates built into the frame. Where your bike’s manual disagrees with this guide, the manual wins.
If you’re not confident about the torque washers or the axle nut torque, a bike shop is cheaper than a new motor cable.